Skip to content
American Journal of Archaeology
  • Home
  • About
  • Current Issue
  • Access the AJA
  • Author Guide
  • Support the AJA

AJA Open Access

July 2020 (124.3)

Image Gallery

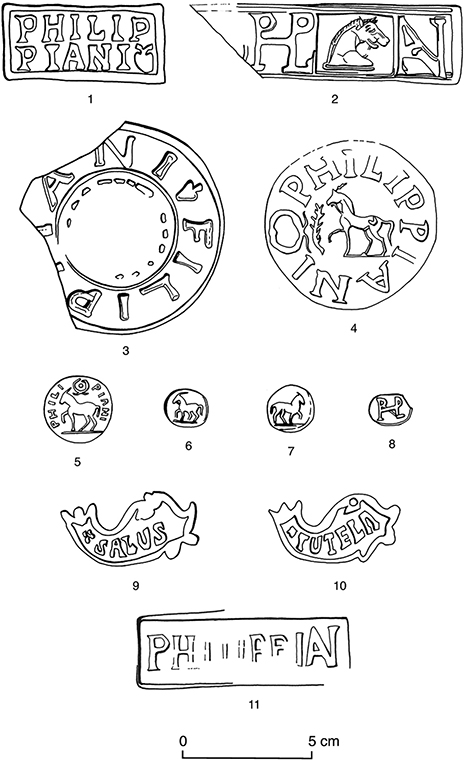
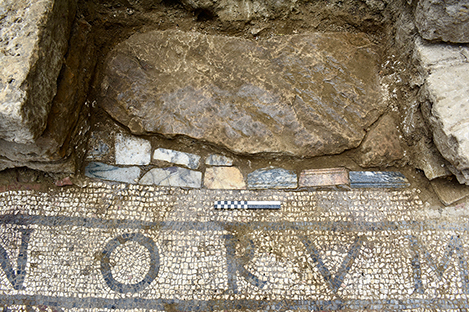
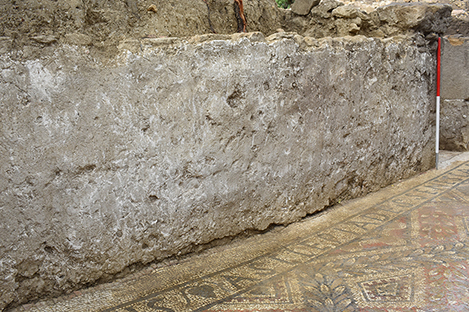
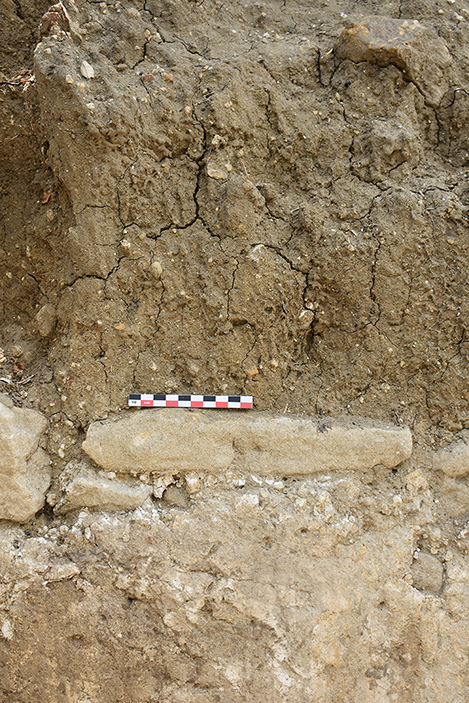
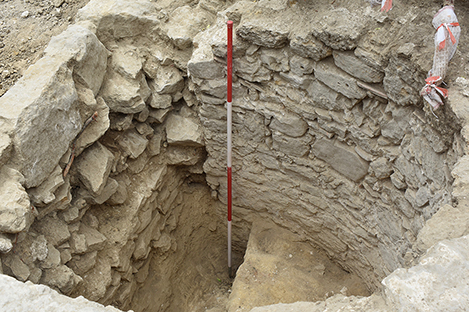
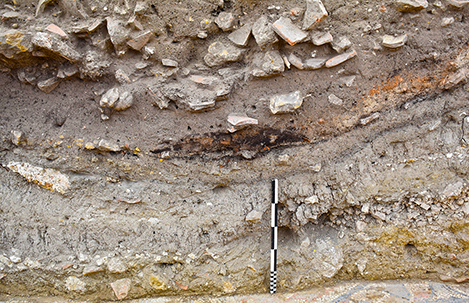
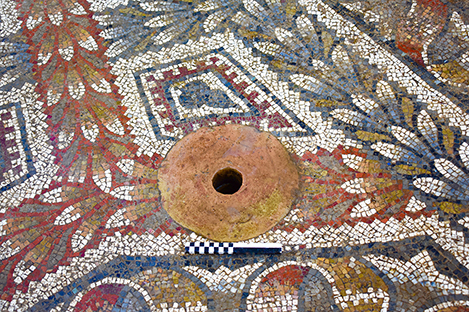
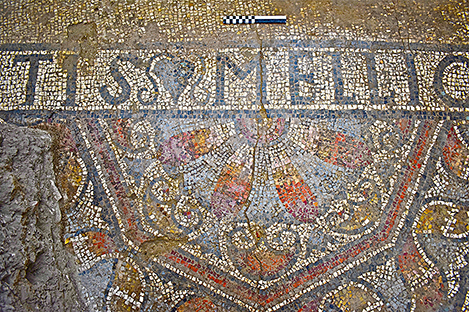
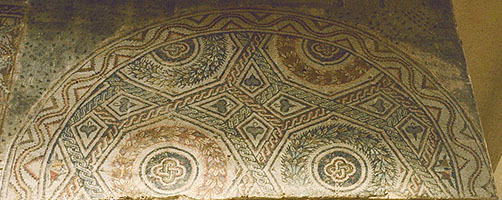
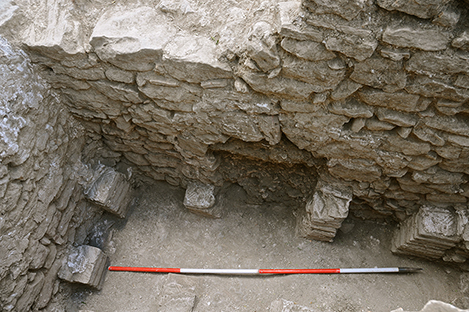
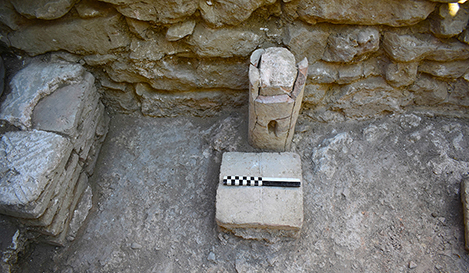
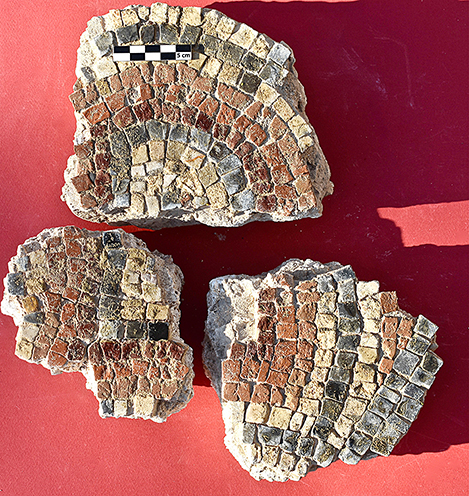
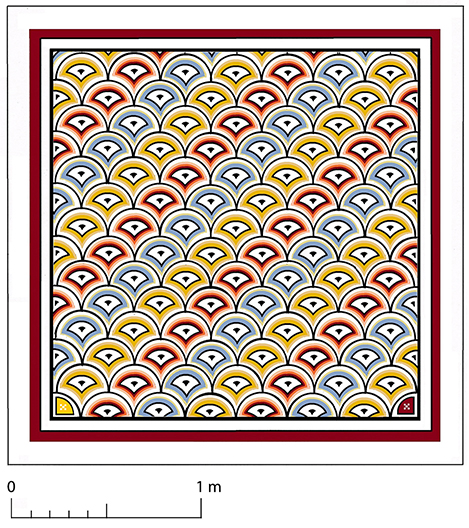
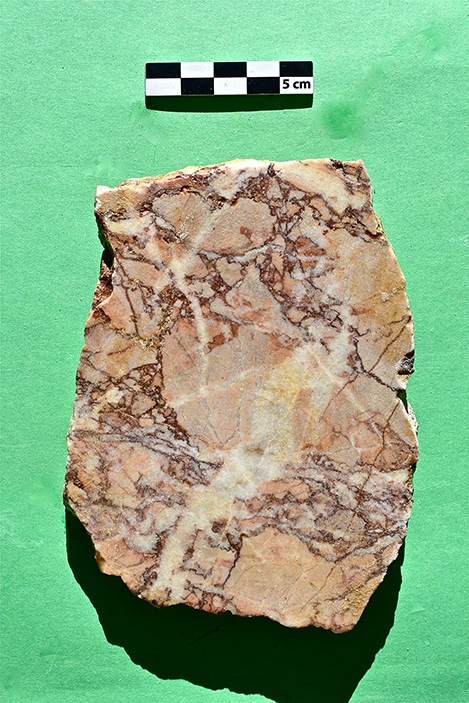
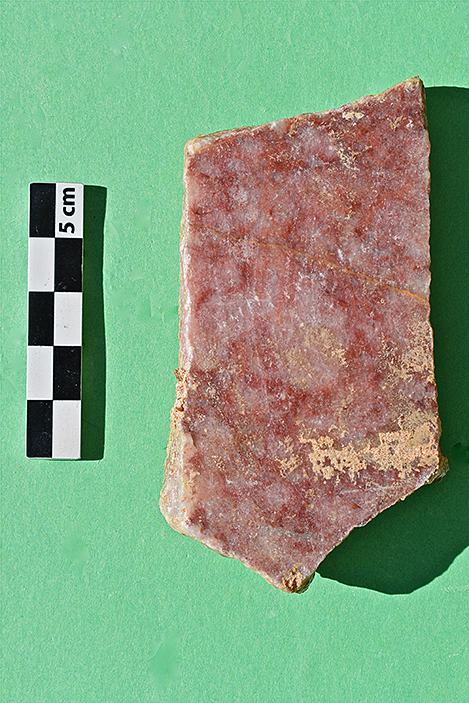
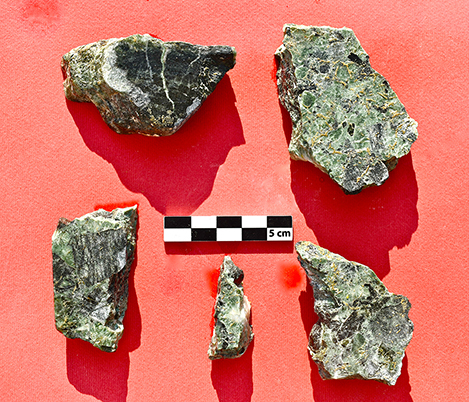
The Baths on the Estate of the Philippiani at Gerace, Sicily

By R.J.A. Wilson

Download PDF
View Article Abstract

Unless otherwise noted in the caption, images are by the author. Images are not edited by the AJA to the same level as those in the published article.

Fig. 1. Drawings of tile stamps Types 1–11 found at Gerace (S. Cann).
Fig. 2. Entrance to the frigidarium (Room 1), from the east (scale: 20 cm).
Fig. 3. Rough, unfinished lower portion of the south wall of the frigidarium (Room 1) (scale: 1 m).
Fig. 4. Upper portion of the south wall of the frigidarium (Room 1); detail of pisé (above) and plastered (below) wall (scale: 10 cm).
Fig. 5. Unfinished cold pool in Room 2, west side. The original low front wall (the top step) of the intended pool can be seen at lower left. After the earthquake, the apse wall was cut back vertically (immediately to the left of the pole), and a makeshift wall was constructed across the front of the pool (left, center; for its front side, see print fig. 9) (scale: 2 m).
Fig. 6. Section through the dumps of backfilled material in the frigidarium (Room 1), showing tip lines (scale: 50 cm).
Fig. 7. Detail of the terracotta drain near the center of the mosaic floor in the frigidarium (Room 1) (scale: 20 cm).
Fig. 8. Detail of the mosaic on the east side of the frigidarium (Room 1) (scale: 20 cm).
Fig. 9. Mosaic showing crossed shields pattern from a domus at Marsala. Museo Archeologico Regionale—Baglio Anselmi.
Fig. 10. Mosaic detail from the Maison de Bacchus at Djemila. Musée de Djemila.
Fig. 11. Mosaic fragments from the first tepidarium (Room 5) (scale: 20 cm).
Fig. 12. Praefurnium arch in south wall of the second tepidarium (Room 6), from the north (scale 2 m).
Fig. 13. A tubulus filled with lime (center) serving as a pila in the second tepidarium (Room 6); compare normal pilae stacks at left (scale: 20 cm).
Fig. 14. Mosaic fragments from the second tepidarium (Room 6) (scale: 5 cm).
Fig. 15. Alternative reconstruction of the floor mosaic of the second tepidarium (Room 6) (drawing by Stephen Cosh).
Fig. 16. A selection of marble wall veneer fragments from the heated rooms: a, bigio morato; b, giallo antico brecciato; c, pavonazzetto; d, portasanta; e, verde antico.
Fig. 17. The 214 intact examples of vaulting tubes (tubi fittlili)found in the excavation of Room 9 (scale: 50 cm).
Fig. 18. Mosaic of Orpheus from the Thermes des Laberii, Oudna. Tunis, Musée du Bardo.
Fig. 19. Contorniate, obverse, with a bust of Trajan and an incuse monogram alongside, probably P ET L for palma et laurus (the palm and the laurel); mid fourth to early fifth century CE (scale: 2 cm; courtesy Münzsammlung des Instituts für Klassische Archäologie der Universität Tübingen).
Fig. 20. Detail of mosaic with a monogram in a Roman villa at Cuevas de Soria (courtesy SoriamuséuM).

Subscribe to our email-only monthly newsletter highlighting the journal’s current table of contents and open access material, such as book reviews.

Check to receive e-Updates for:

Would you like to receive periodic mailings with information on new products and services offered by our advertisers and sponsors?

AJA 129.2 - April 2025
  • About
    • Who We Are
    • Editorial Policy
    • Historical Timeline
    • How to Support
  • Access
    • Subscribe
    • Open Access
    • Archive
    • UCP
    • JSTOR
  • Submissions
    • Guidelines
    • Manuscript Preparation
    • Forms and Checklists
    • Books Available for Review
  • Contacts & FAQ
    • Submission Site
    • Advertise
    • Permissions & Reprints

The American Journal of Archaeology stands in solidarity with Black, Indigenous, and People of Color against systemic injustice in North America and throughout the world. The Journal fully endorses the AIA Statement on Archaeology and Social Justice.

  • Privacy Policy
  • Contact Us
© 2025 Archaeological Institute of America
Website: Castle Builder Design